Theory and practice
Because I would like to show you not only the theory (the pattern), but also the result of my somewhat unconventional dart construction, here is my result.
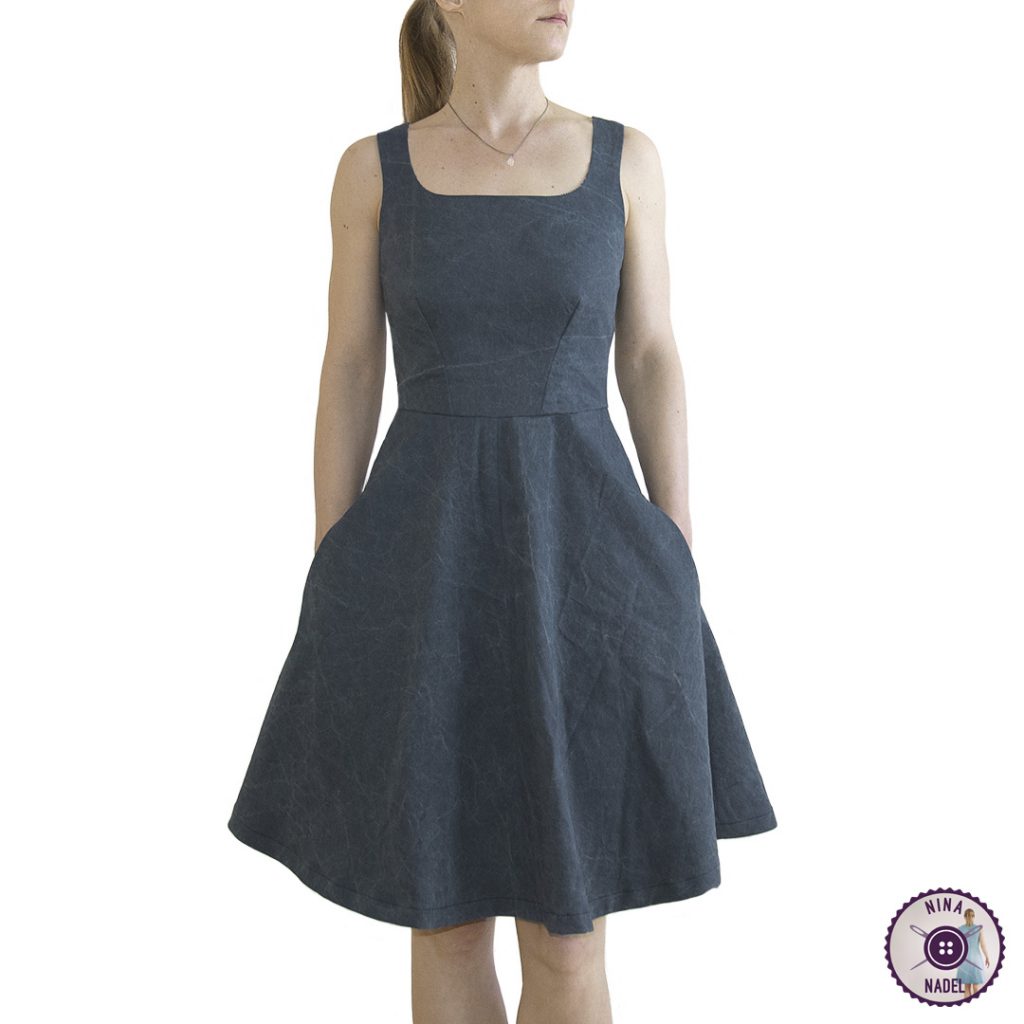
Yes, this is certainly one of the most boring looking dresses I’ve ever sewn, but unfortunately I don’t have a lot of fabrics in stock and since I’m temporarily (since March) without income due to the corona crisis (contact restrictions), and working in my profession (self-employed) is currently simply not possible, I had to see what else I had available. And that was this fabric. A nice grey denim fabric, which to my great disappointment got destroyed during the pre-wash. The stripes are not intentional, but rather worn out (broken) parts of the fabric.
To the pattern
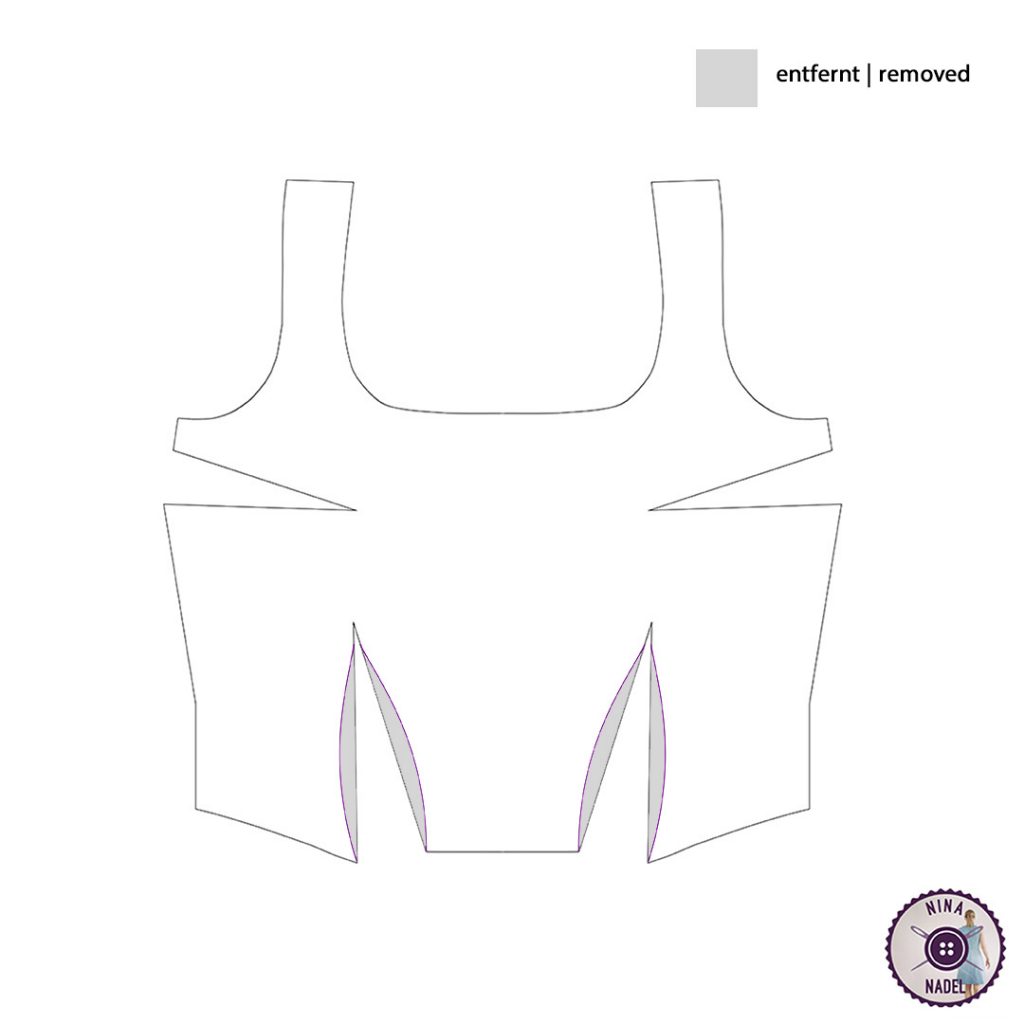
But now let’s get back to the pattern. As you can see, I’ve made two small changes compared to my last post (see HERE). First, I rounded the waist darts, so that more fabric was removed under the bust to optimise the fit.
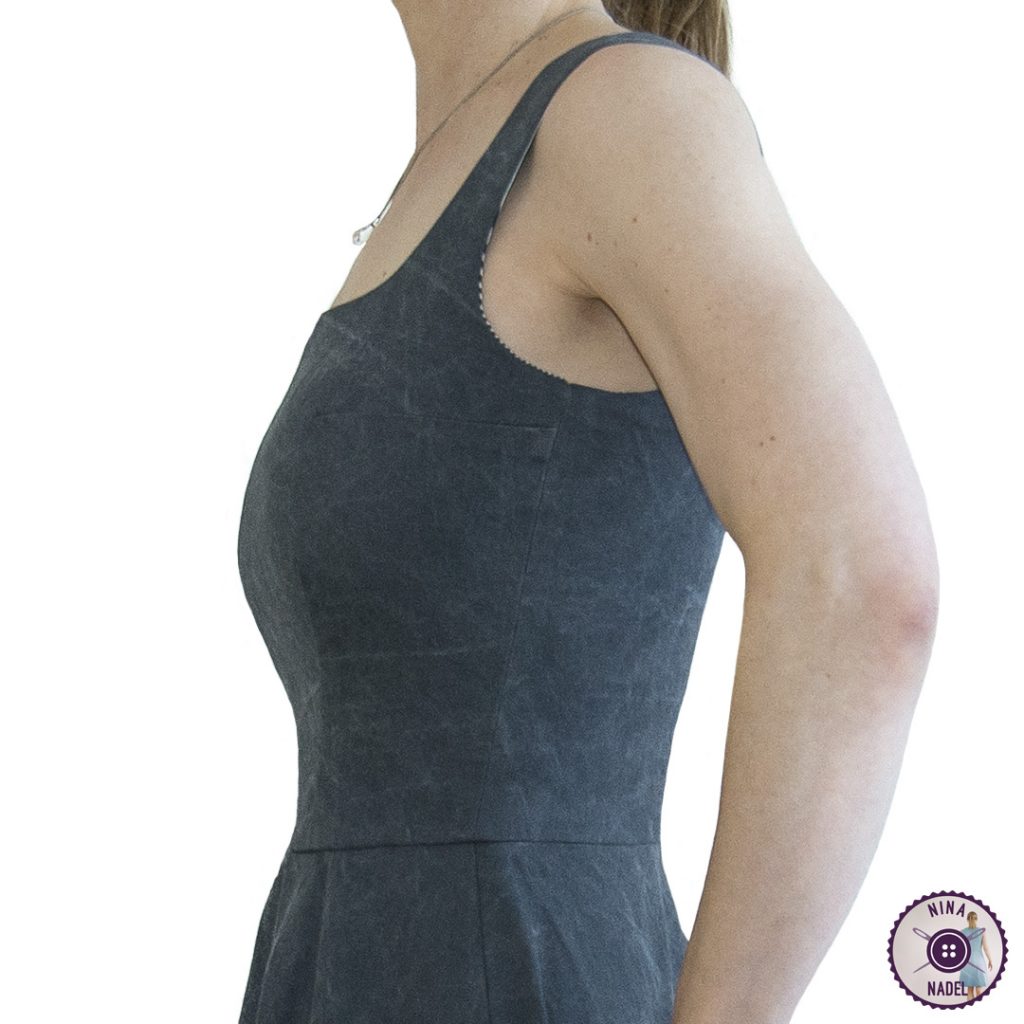
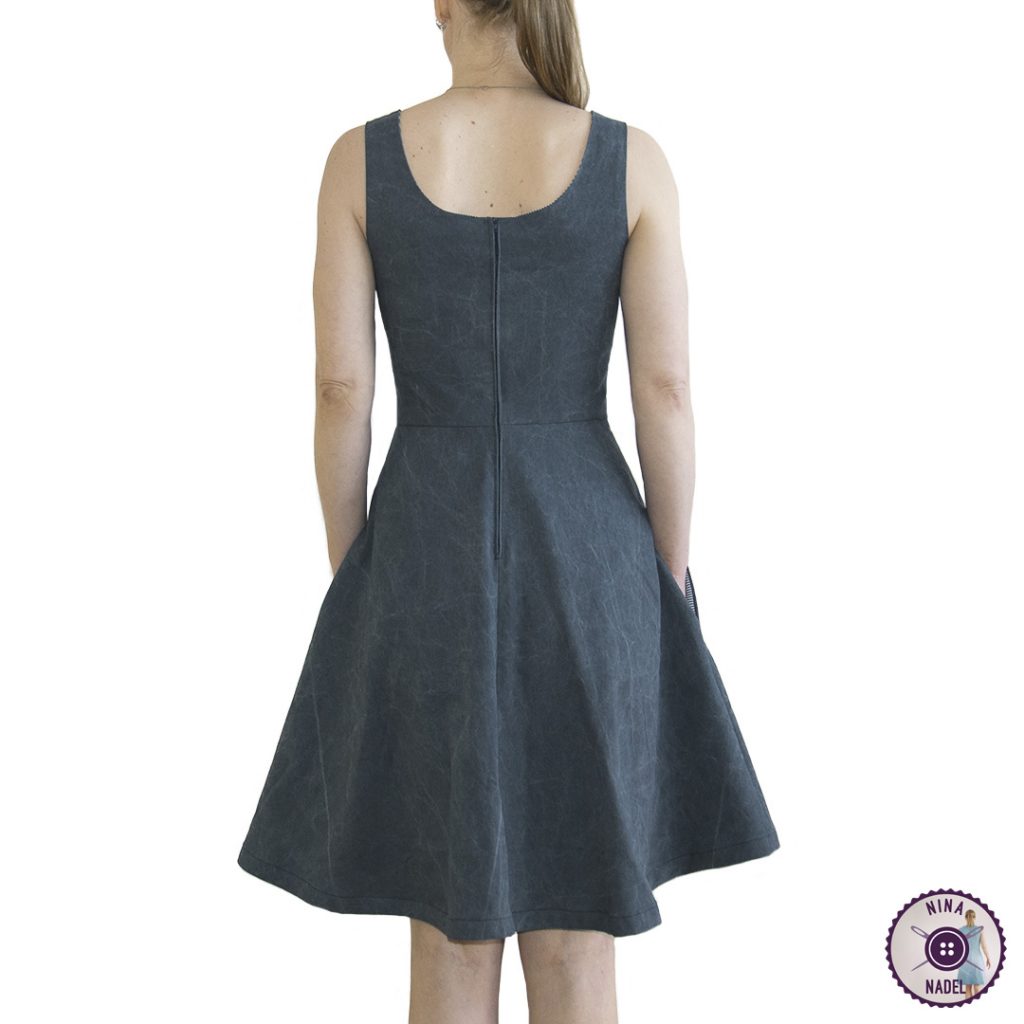
With softer fabrics I would have taken out even more, but due to the stiffness of the fabric I just didn’t want to risk new wrinkling / bulging. I also opened up the back neckline a bit more, but this I only did for optical reasons.
New pattern pieces

My Tip:
fitting test
I know that such adjustments scare many people off at first, because they think they can do something wrong. But especially with larger cup sizes, problems are often to be expected with generally constructed tops with darts, especially when it comes to a figure-hugging fit. Reason: Every one of us is built differently, sometimes the bust point is not in the right place, or the distance between the breasts is smaller, or even larger – as it is with me. That’s why I always advise you to sew a test-version first, because only if everything fits correctly, a figure-hugging dress is comfortable to wear.
And even if you have no idea of how to construct or adjust a pattern, with the help of these test-versions* you will be able to see where the problems are (*usually you only need the front & back parts (no lining) for the test-version, simply cut off the seam allowance of the neckline and armholes and then sew everything together). For the fitting, pin in a zipper so it doesn’t get lost and can be reused later. At least that’s how I do it.
pin with needles
If you then notice that there is too much fabric at some places, or the bust point doesn’t fit yours properly, you can undo the darts, put on the test-version again, this time inside out and rearrange the darts in the way to make them fit your body best.
In my case it has led to the fact that the bust darts has become significantly longer and thus no longer converges with the waist darts on one line and the waist darts are quite slanted, so that the distance between the bust points works for my body and my waist without leaving too much fabric, which can then form wrinkles / bulges. (By the way: If you change the width of the bust darts, you also have to correct the length of the side seams of the back, because the length of the side seams of the front will change. + If you round the waist darts, as I did here, you should also check the length of the front on the body, as this change will make it a bit shorter – depending on how much you rounded them).
Patience
Sure, it’s a bit of work and needs a bit of patience, but isn’t it better than being disappointed about a badly fitting dress in the end?
Of course I know that this trial method is not the most scientific or the “correctest” one, but it works and it’s no science! 😉
If you have any questions about this, feel free to contact me by email, I am always happy to help!