The Sophie Swimsuit by Closet Case Patterns
Once again I’ve discovered something really lovely – something I’ve been looking for in a long time – a sewing pattern (digital) for a bathing suit or a bikini in vintage style, which offers you a wide range of design possibilities. Isn’t it gorgeous?

sizing
The sewing pattern comes in US sizes 0 – 20 and with 5 different cup sizes. YEAH ….. such a selection of sizes I would love to be able to find in our shops here. My last try to buy a bikini ended with great frustration and was from a brand that had “special needs” in its name. 🙁 The cup sizes of this pattern are not really like the ones you can buy, but they come with a detailed description of how to find YOUR personal size and you should give it a try, it is really well-conceived.
bonus
Something that I personally think of as a great bonus: The sewing pattern comes with two variants. A swimsuit version & a version for a bikini with high waisted bottom. Although it is recommended to sew with foam cups, I do not feel comfortable in it, it always feels more like an “armor” to me, so I have sewn my version without foam cups and it is okay, since foam cups are considered as “optional” and not as “must” + there are sewing instructions for both options.
I have to admit though, that after cutting my fabric + my lining I was a bit cowed, soooo many pieces & in this picture the straps are still missing. 😉

But I wasn’t right with my concerns. The instructions (English + French) are very well written + come along with really good graphics. Everything is easy to understand and explains step by step how to assemble all these parts and how to stitch them together. I have sewn my Sophie with a normal sewing machine (because I have no other) and although I had some problems with the very “slippery” swimsuit fabric, I am suuuper happy with my result. I think the problems I had with this fabric will be solved as soon as I have some experience with it. But this is my first try!
What I also think is really good: There is some kind of scale in the instructions so you can see exactly – if you already have your fabric at hand – how far this has to be stretchable to be suitable for this pattern. Initially I was very very insecure about this, because these swimsuit fabrics are new to me and therefore very difficult to estimate.
My modifications
Minor modifications I made after sewing my test version:
1. For the back (“wings”) I didn’t use lining fabric for swimwear but powernet, because my test version was too loose for me in this area and I prefer a somewhat firmer fit. Because in the end it is a US size 2 with a cup 5.
2. I expanded the bridge (“cradle”) – like I always have to when sewing my bras – at the top (between the breasts), since I have quite a lot of space there + I gave the pattern piece a curve at the bottom, because for my personal taste there was a bit too much fabric in this area. For this I simply followed these instructions: Turning the Sophie Bikini Top into a Foam Cupped Bra. At this site of the Closet Case Patterns website you will also find many more tips for sewing the Sophie Swimsuit + a free pattern extension for a long version of the bikini top.
3. The bikini bottom I have shortened to hip height. Not because I do not like the look of the high-waisted pants, or they didn’t fit me (test version), but simply because it looks somehow funny on my body and I know myself well enough and know that I would not wear it in this form. And in the end I am sewing because I want wearable clothes and not just to blog about it! 😉
4. The straps I made a little more narrower, since they looked somehow “massive” on me, but this is just a matter of taste.
sewing tips
But now to my sewing perception with my sewing machine:
used presser feet:
– walking foot: for sewing swimsuit fabric & swimsuit lining
– normal presser foot (zig-zag presser foot): for sewing the swimwear elastic, underwire channelling, closure
– edge presser foot: for top stitching
At this point, I would also like to show you how I have sewn the swimwear elastic to the upper cup area, because this part is the only part which for me somehow got too short in the given instructions. I also didn’t have the stated “clear elastic” at hand and according to some traders I asked the clear elastic you can buy here in Germany is not really resistant to salt- or chlorine water, so I used swimwear elastic instead.

without image: The cups (fabric + lining) are sewn together at the upper edge, right sides facing and with a seam allowance of 1cm.
1. I then placed the swimwear elastic next to the seam onto the seam allowance and
2. sew it with a zig-zag stitch (see stitch settings in the instructions) and slight stretched to the unstretched seam allowance.
3. Then I turned everything so that the nice sides of the fabric are on the outside and stitched again from the outside with a zig-zag stitch (see stitch settings in the instructions) to stabilize it.
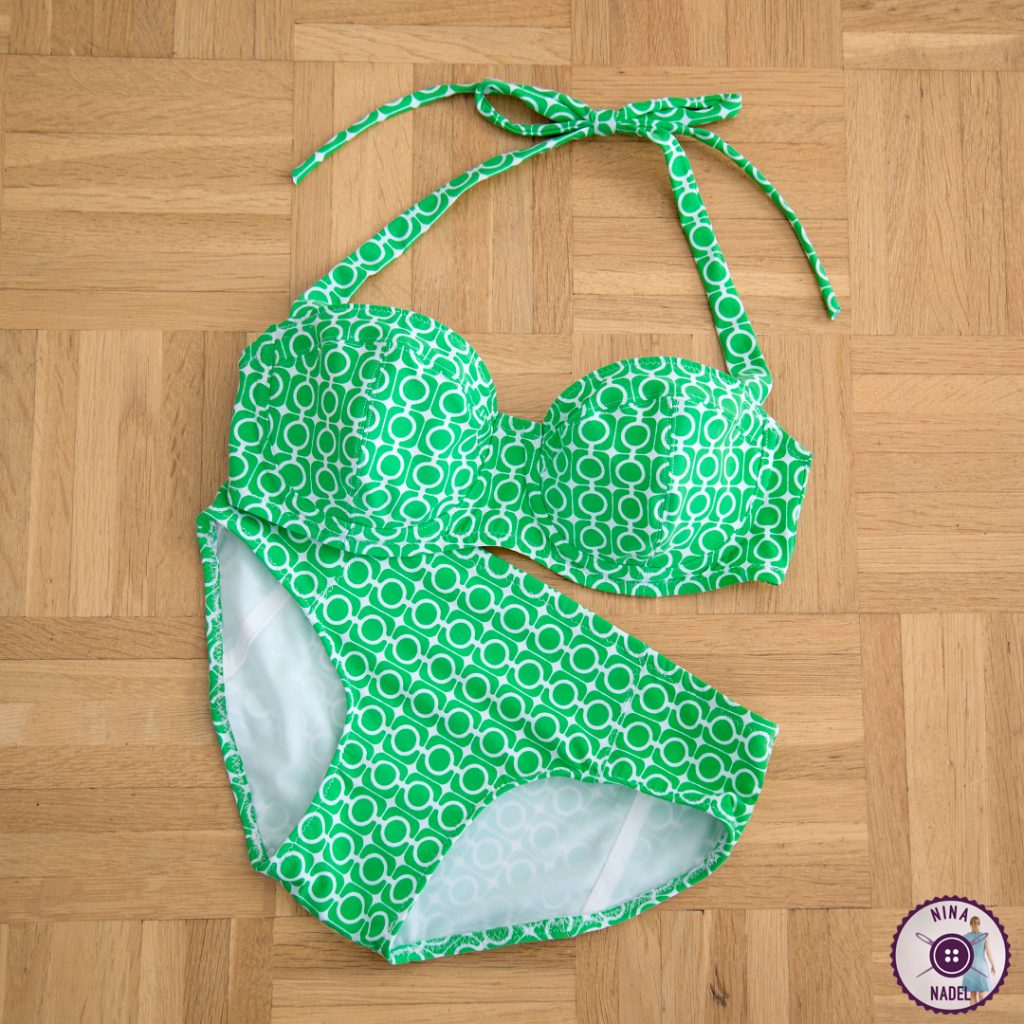
And here it is: My green Sophie Swimsuit (View B) without foam cups
My conclusion
Big enthusiasm! I’m in love with my new bikini.
The bikini top fits just great, nice round shape, and although sewn without foam cups the support is amazing. The pants are also fitting well, but next time I’ll give my butt a bit more space in it so that my curves will be shown off to its best advantage. For swimming – I think – this version is perfect, as it sits well and firmly to the body.
So all I can say: Give it a try! I really recommended this pattern! The instructions are well thought out + easy to understand. Whether it is recommended for sewing beginners, I can’t say, I think it depends on what you think you are capable of and what not, some experience with these smooth and slippery swimwear fabrics is certainly an advantage. However, if you have already sewn a bra, this pattern will be easy for you to handle.
Thanks Closet Case Patterns for this wonderful sewing pattern! I surely will make some more!