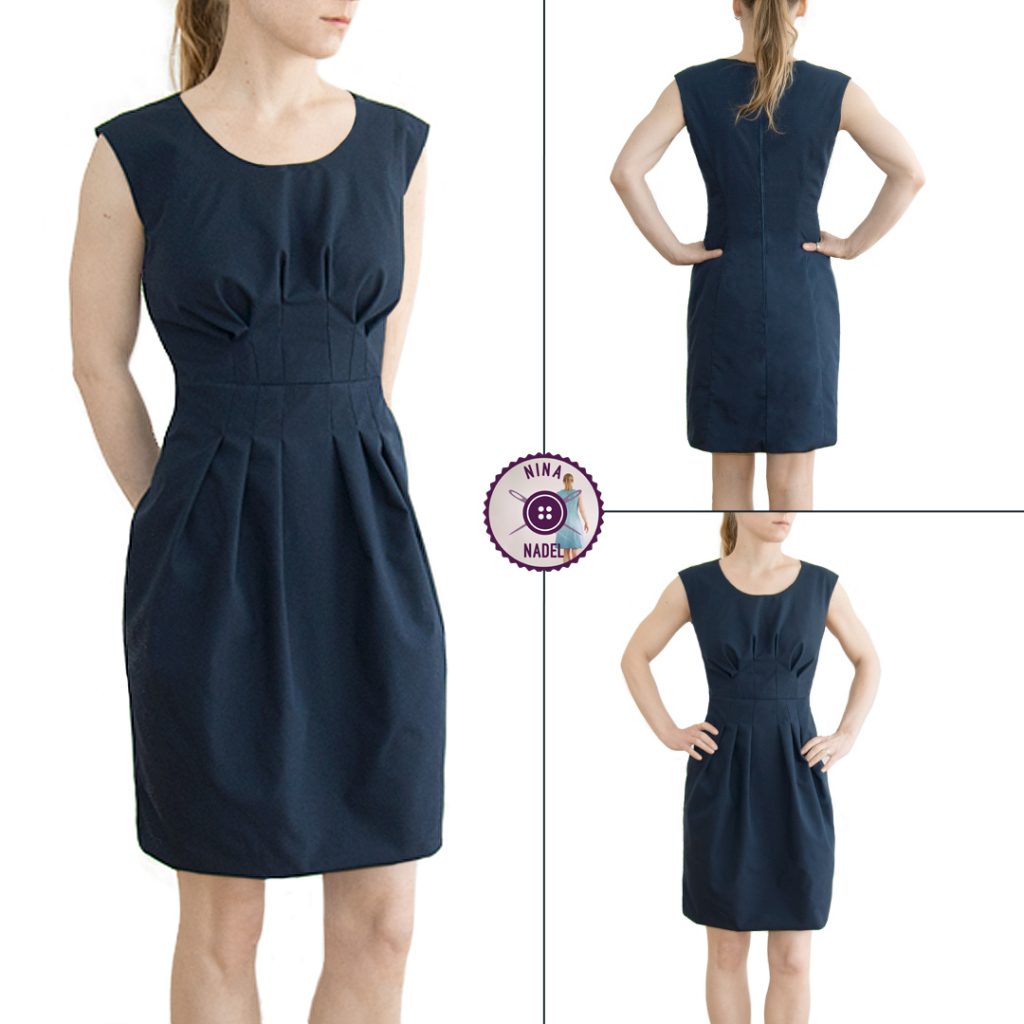
This is going to be my first summerdress for 2017. A pleated dress!

And yes, once again it is a sewing pattern from bootstrapfashion. 🙂 This time it’s a scoop neck dress with pleated waistline. (bootstrapfashion: No. 40679)
The sewing pattern was made according to my measurements and it was already apparent from my muslin that, apart from some really small adjustments, e.g. at the back (width adjustment over the butt for my light hollow back) there was nothing else to do. The fit is exactly the way I imagined it. There is only one thing I like to say about it: Bingo! 😀
But since I am lining this dress + I don’t really like bias binding, I’ve thought of a somewhat different way of sewing this dress, which I would like to share with you now.
Menu:
1. Preparations
2. Fabric cutting
3. Sewing instructions
a) The back of the dress
b) Shoulder seam
c) Neckline and armholes
d) The pleats of the upper front
e) The pleats of the front skirt
f) Join the upper front and the front skirt
g) The hem
h) The side seams
i) Back seam and zipper
j) My finished dress
1. Preparations:
Order your custom-fit sewing pattern from www.bootstrapfashion.com. If you have somewhat difficult proportions like me, please use the pro-fit options. They are amazing!
Print the sewing pattern (pdf) at 100% , glue it together with sticky tape and cut out the single pattern pieces.

For my sewing method, please check the fit in advance by sewing a muslin, because later adjustments are unfortunately kind of difficult. If you prefer to work according to the supplied sewing instructions (ie without lining and with bias binding), you can also adapt the fit later.

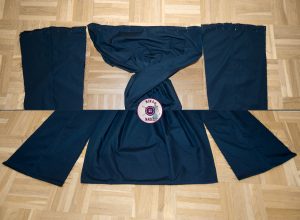
Note: The arrows with 1 & 2 point at two different variants of how to sew the skirt pleats, I have decided to go for 2, therefore I’m using the stitched and not the just laid pleats! 🙂
2. Fabric cutting:
Because I line my dress, I’ll need all pattern pieces two times, just without the front and back neckline facings.
I also always work with an exact seam allowance of 1cm, as I find the later work much easier. For example, all the cut pieces can always be placed perfectly edge on edge and can then be sewn with the help of the cm marking on the metal plate under your presser foot very precisely.

Please make sure that you also transfer all notches and fold lines! The fold lines I have transferred with copy paper and roll wheel, for the notches I made small cuts into the fabric.

3. Sewing instructions:
a. The back of the dress
Here you have 2 pieces for each side and the same for the lining (so 8 parts in total). Now take two pieces that belong together and place them together right sides facing (right side of the fabric = pretty side of the fabric which should later point outwards). I always put the needles at the notches first and then work along the fabric until the complete seam is pinned.

If everything is properly pinned, sew the pieces together (seam allowance 1 cm, or the one you have chosen). In order to keep the seam stable, sew at the beginning a few stitches forth and back, then sew the whole seam and then repeat this step at the end of the seam again, so it is sealed and can not open spontaneously. Then I’m finishing the seam allowance together with the overlock-stitch of my sewing machine and iron it to the outward direction (sideseam). If you do not have this stitch on your sewing machine, you can also use a small zig-zag stitch and place it directly on the edge of the fabric. This you have to repeat 4 time, so you end up with 4 back parts (2x dress, 2x lining).
This is how the finished and pressed seam allowance looks now. I hope it is visible!

b. Shoulder seam
No kidding? What is with the pleats of the upper front? Well… now my way of stitching starts!!!
In my method you now sew the shoulder seams. For this you take two mirror-inverted back parts and one upper front part, put & pin them right sides facing and sew them together. At this point I am usually to lazy to finish the seam allowance, instead, I just iron them apart. 🙂

If you have done this step for the outer and the lining dress, you now precisely place them together right sides facing again.
c. Neckline and armholes
Pin the neckline, in this case I put the first 2 needles through the shoulder seams, then one in the middle of the front part and one at each end of the back parts, then I worked my way along the still open parts until everything is evenly pinned together. Sew the seam. In order to make them easier to bend later and to avoid bumps, cut the seam allowance at small intervals (approx. 1cm) till right before the seam (DO NOT cut into the seam) and then iron the seam allowance – if possible – apart. With the same procedure you now pin together the armhole openings, sew them, cut the seam allowance till right before the seam and iron them – if possible – apart.
If all these things are done, pull one back part through the respective “strap” & repeat this on the other side, so finally you have the right side of the fabric on the outside and you can see that neckline and armholes are already finished – without bias binding and without visible seam.

d. The pleats of the upper front
Sure, you could also have sewn the pleats before this step, but since the pleats of this dress should “fall open”, I had concerns that these might look funny when I sew the pleats into both upper front parts separately and then only place them together. So this is how I am doing it. I take the “dress” (this already consists of the backs + 2 upper front parts) and put these exactly together – fabric edge on fabric edge – left sides facing – and then I start to fold the pleats (through both fabric layers). So I work with 2 fabric layers, but this way the pleats “fall open” synonymous as desired.

photos:
1) pleats folded and pinned: The pleats are folded along the transferred fold lines on the right side of the dress and then pinned and sewn together on the left side (which is now the right fabric side of the lining).
2) sewn pleats at the lining side: left – not ironed, right ironed, iron the resulting “dart” or the pleat so that it is pressed flat and lies centrally on the pleat seam.
3) This is how the pleats look from the right side of the fabric (the outer side of the dress) now.
e. The pleats of the front skirt
As I have now processed the upper front as one layer of fabric, I’m doing this with the front skirt too. Therefore place both front skirt parts exactly (fabric edge on fabric edge) together, left sides facing and fix them with some needles, fold the pleats as you did for the upper front and sew. These pleats are now pressed outwards (ie to the later side seam) and not “flat” like you did at the upper front.
f) Join the upper front and the front skirt
Now you have to join the front skirt to the upper front. Care must be taken here to ensure that the seams of the pleats later form a continuous line in the front of the dress. So put the upper front and the front skirt right sides facing and pin with your needles exactly through the seams to connect the “lines”, then pin the remaining seam and sew. And to make sure, that the fabric doesn’t fray (because with my sewing method, the connection seam of the upper front and front skirt is visible from the inside of the dress) this connecting seam has to be finished with an overlock- or a small zig-zag stitch. Then press the seam allowance downwards. And that’s how it looks from the ouside now!

g) The hem:
What? You may wonder, no side seams? Of course there will be side seams, but not now. First hem the front skirt and the lower back parts separately. Pin them together right sides facing, sew and iron the seam allowance apart and turn them inside out. At the front skirt, you have to twist the skirt a little so you can place them right sides facing. (see photo) I am doing it this way, because I don’t want to have a visible seam at my hem, just like I didn’t want it for the neckline and armholes.
photos:
top: pinned twisted
bottom: finished hem from the outside
h) The side seams:
So, now we sew the side seams! 🙂 Since the back parts (outer dress and lining dress) are still only connected at the shoulders, neckline and armholes, you can now put them together in such a way that the back parts surround the two upper front parts as well as the front skirt parts. The fabric layers are right sides facing. At the end of the hem push the two ends exactly together. In order to keep them stable for sewing, I fold the hem apart and insert a needle through the seams, do the same at the armholes. The next points to be pinned are the notches and then I work myself along the still open places. Sew together all 4 fabric layers with one single seam. Repeat this step for the other side.

Now iron the seam allowances apart, finish them and fold down the back parts so you have your dress with just an open back seam in front of you.

i) Back seam and zipper
For the back seam, which is in fact only the lower part of the skirt, I first measure where my zipper is going to end, starting from that point I now pin and sew the skirt parts (this time outer dress & lining dress separately) right sides facing together. Iron the seam allowances apart and at the same time fold and press the seam allowance up to the neckline to the wrong side.

Now pin and sew the zipper to the outer dress. Everything that is still left to do now is to “close” the lining at the backside. To close the lining sew it by hand to the inside (to the zipper band), make sure that you can’t see any stitches from the outside and the dress is finished!

j) My finished dress
And if you have any questions, please do not hesitate to contact me and I’ll try to help the best I can. Find my contact form HERE!
If not, have fun with it! 🙂