I sew myself a winterdress, how am I doing that … a step by step guide!
However, for all who are only interested in one or the other step can use this small “menu” in my post for jumping back and forth. 🙂
Menu:
Step 1: Spoilt for choice of the sewingpattern
Step 2: Preparation of the cut, or the cut parts
Step 3: Sewing-instructions
Step 4: Now we can finally start with the pin and sew! Yeah!
Part 1: Upper dress & skirt parts
Part 2: Sew the “torso” of your dress
Part 3: The sleeves
Part 4: The zipper
Part 5: The collar
Part 6: The cuffs
Part 7: The hem
Part 8: My winterdress (result)
Instructions
Step 1:
Spoilt for choice of the sewingpattern -> I have chosen my own-dress-design sewingpattern by BootstrapFashion.

By using the service of this company you have various possibilities. You can make your own dress-design by choosing out of different options (tops, skirts and pants, as well as jackets are coming soon as well) , or you can choose from a variety of ready-to-sew patterns. The great thing about their service, you can specify your own measurements and the pattern will be constructed exactly for these measurements. For the ready-to-sew patterns there is even another highlight: The PRO FIT – options, here you can be even more detailed about your individual physical characteristics, for example the height of your bustpoint, the length of your back and all sorts of other adjustments.
And if you’re thinking that you have to spend a fortune for such a service, you are wrong, the ready-to-sew patterns (pdf) with all the above-mentioned adjustments are starting at 2.99 $.
But lets go on…
Step 2:
Preparation of the cut, or better the cut parts
First of all I would advise everyone to start with a sample-piece using a simple fabric, so you are able to make some pattern-adjustments without wasting the final desired fabric. But that’s something you have to decide for yourself.
If the fit is checked you can go on. The fabric should always be layed out smooth and without wrinkles in front of you, best ironed. If you have parts that are marked with “cut on fold” (the fabric lies in 2 layers with the fold line forming the centre line), please make sure that the fold line is straight. As seam allowance I always take between 0,39 inch and 0,59 inch, depending on how inexperienced you are, prefer the 0,59 inch, then can later easily add some extra width here and there.
Important:
Once you’ve pinned your pattern pieces on the fabric (make sure the grain is correct), draw the seam allowance as accurately as possible, that makes the sewing much easier, because you can orientate youself at the centimeter or inch specifications of your sewing machine (under the presser foot). Also make sure that you transfer all marks from your sewingpattern to your fabric, because at these points your pattern pieces are pinned together first.
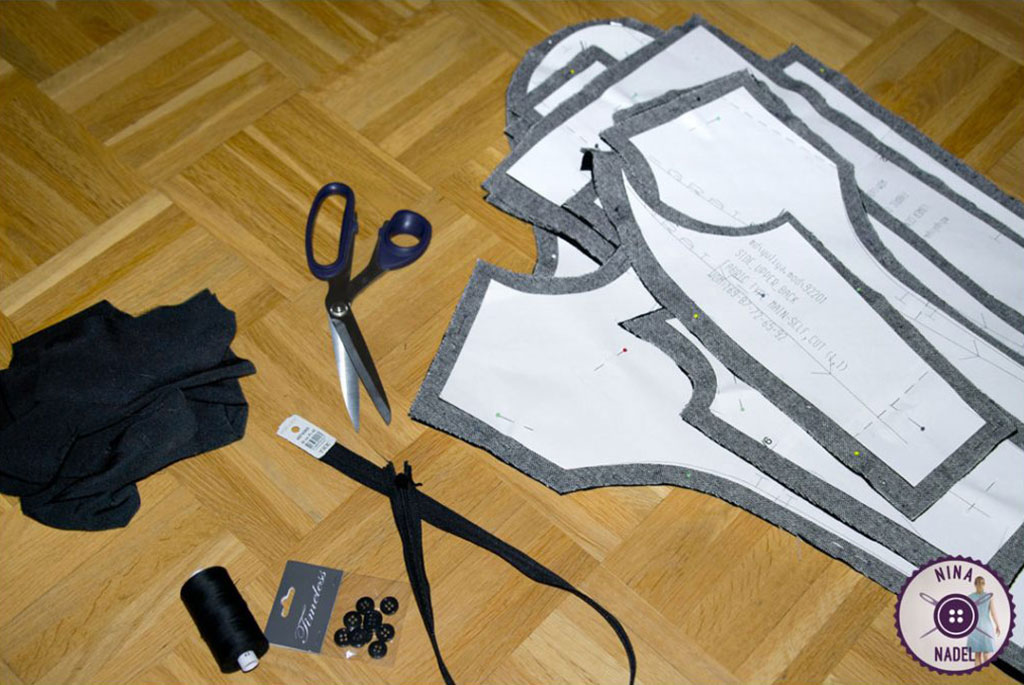
So this is how my cuted pieces do look now and I also love putting everything else I need together before I actually start.
Step 3:
Sewing-instructions
I always read the sewing-instructions that come with the sewingpattern several times, always step by step until I truly understood everything and this I am doing even before I’ve sewn the first seam. If you want, you can now get the cutted pattern pieces into the order specified in your instructions, then you always know when each part is to be next in line.
Step 4:
Now we can finally start with the pin and sew! Yeah!
Part 1:
Upper dress & skirt parts
This dress is relatively simple, because you only have to pin the patternpieces (right sides facing – the nice fabric sides, which will be visible later, lie on one another) together, insert the needle in distance of your predetermined seam allowance. At this point you will also realise why you transfered the given marks from your pattern to your fabric, because at these marks you insert the first needle and pin from there to the edge of the fabric, do this as precisely as possible.
At this point you now sew the pieces with a fine straight stitch together (orientate yourself at the specifications lines under the presser foot of your sewing machine, and choose the one that represents the seam allowance you have chosen) and to make sure that the seam does not open again, start by sewing a few stitches forward and back again, then sew the actual seams and make the same again at the end, this way the seam is virtually sealed.
Note:
Some people like to neaten the single pattern pieces before they start to sew at all, but I like it better after I’ve sewn the seam and ironed my seam allowance. It is important in any case to make the fabric not to dissolve later. For this finishing, I use either a small zigzag- or an overlock-stitch. Which of these two stitch you use for neaten/finishing is a matter of taste or sometimes simply depending on the skills of your sewing machine.
And this how the front and the back do look now…

The upper front part is just like the front skirt made out of 3 individual parts. The back of the dress is quite similar, only the “centerpiece” is in 2 parts, so you have 4 individual parts for the back, the center remains open, since the zipper is inserted later and I assume that you want to be able to put the dress on as soon as it is ready. 😉
-> Have you reached the point where all seams as described above are done, remember to iron and finish them. How you finish the seams is depending on your given sewing instructions (either you finish them separately (each side of the seam allowance on its own), or if the seam allowance is to be ironed to one side, finish them together (in a double layer).
Part 2:
Sew the “torso” of your dress
Now you have to bring the upper- and skirt-parts of your dress together, pin them, right sides facing, and ensure that the seams from the upperdress and the skirt extend in a line. Sew, iron and finish the seams. Now we get to the two side seams of the dress, pin the pieces together, again right sides facing, pin at the transfered marks at first and work your way from there to the edges of your fabric, then sew. Now you can check the fit of your dress for the first time and as long as you haven’t finished the side-seams you can easily optimize the fit by giving it a little more or a little less width if needed. Is the fit ok, iron and finish the seams and your “torso” is ready. And? Was it really that complicated till here? 😉
Part 3:
The sleeves
At first you have to sew the long side seam of your sleeves together, right sides facing, and do not forget to iron and finish the seam afterwards. Now the two sleeves at least start to look like some.
But the sleeve must still get sewed into the dress. For many indeed the absolute nightmare, but if you pin carefully, here it is easier if you put your needles across the open edge of the fabric, only little can go actually wrong. Turn the torso inside out (pretty fabric side inside) and pushes the sleeve (this was previously turned, so the pretty fabric side is outside) from the inside in the armhole. I always put in the first needles at the transfered marks and the lower sleeve seam (lower armhole and then work myself along the open spaces.
Tip: set in sleeves
If your sleeves have a little more width than needed to fit into the armhole and you want this to be done without wrinkles, sew with the longest stitch setting of your sewing machine two seams along the rounding of the sleeve caps (or even sleeves point to sleeves point, these are normally the points where your pattern already have marks) right next to the later seam (leave the thread-ends long and tie a knot at one side – do NOT seal these two seams). By pulling these threads you can adjust the sleeve width to the correct width for your armholes (it looks slightly ruffled now). While sewing, slightly pull the fabric apart again (to remove the ruffles) as soon as it reaches the presser foot of your sewing machine and you get your sleeves sewed in easily. If you still have some wrinkles sewed into your seam, do not despair, simply reopen the seam at this point, with a little space on the right and the left (about 0.5 – 1 cm) and sew again. The two “auxiliary seams” are then withdrawn and if you are satisfied with you sleeves now, finish your seams and you are done!
Unfortunately I forgot to take pictures of this part, which I asume would potentially be quite helpful, because I still remember quite well how scared I was of this step when I started sewing cloths. 😉 Maybe next time as a seperated tutorial…
first results
Anyway… this a how your dress should look like by now and since I love to have a complete lining for my dresses you can also see my black lining dress in the photo. Is is sewn the same way as the upper dress. To prepare for the zipper I now close the center rear skirt seam (on both dresses) at the upper-dress up to the point where you want your zipper to end, at the lining dress please leave a gasp of 5.91 to 7.87 inch open. The reason I will explain later. Iron the seam allowance apart and finish it separately.

Part 4:
The zipper
I have decided to use a “hidden” zipper for this dress, because I can “hide” the upper ends of the zipper in my later standing collar, so I can sew it in till right up to the top of my dress. The reason why this is important is that bending the ends unfortunately does not work with these zipper, as it then forms an unpleasant “bump”. Have you decided to make a dress without a standing collar, sew in the zipper (if you also want to use a “hidden” one) so that the upper ends (where no longer is the real zipper) ends directly at your seam allowance, the seam allowance is then virtually empty.* “But this way there will be a small gap at the top” you might think, and you are right. Close this gap by using a button and button loop closure. Here at my dress I used such a closure at my collar, but there will be a photo of it later in this guide.
* Standard zippers however can be sewn in exactly up to the edge, so the upper “empty” ends of the zipper is on your seam allowance and you can then simply fold it along with your seam allowance.
-> At this pint I decided against a propper description of how to properly sew in a zipper, because 1. I’m still not really good at it and 2. there are already many really amazing instructions, whether as video or as written text, on the internet , simply google it … 😉
Part 5:
The collar
For the collar I cut both parts (inside + outside) from my main fabric (gray), since the inside possibly can peek out a bit and I do not want to see any black there. The collar part that is going to be on the outside later I reinforced with fusible interfacing (I almost always use Vlieseline G 785, because I like this one the most, but there are many others). What kind of fusible interfacing you ultimately use is your decision and should be made depending on the used fabric and the desired effect, or you just use the one that is recommended in your given sewing istructions. 😉
prepare the collar
The two collar parts are now placed right sides facing. Sew the outside seam (which is the long side that is to protrude up to your chin later) as well as the short outer sides. Important: On the short sides, the seam allowance has to stay open, so sew only up to the point were your seam allowance starts.
If both collar parts are now connected, ironed the seam allowance apart, trim the top corners to just before the seam and cut at short intervals along the “roundings” into the seam allowance until shortly before the seam. This will help you to get the collar look smoother, because the seam allowance is indeed excessive and otherwise the rounding can not adapt propperly. Then turn the collar and iron it again. To properly press out the corners I always use a corner and edge shaper for help because it is easy to use and doesn’t ruin your fabric, as it might occur if using the tip of your scissors or something like that.
Sew in collar
So … your collar is ready now….but you still have to bring it together with your dress. For this, you pin the outer collar (the collar part which is reinforced with fusible interfacing) with the open side (start pinning at the marks), right sides facing, to the neckline of your dress and sew, the other side of the collar, again right sides facing, you sew to the neckline of your lining dress and you have already connected the dress with your lining. And even if you are not going to see this seam later, finish it. However, make sure that the seams of the short sides of your collar (the ends on the backside) matches the ends of the zipper. Unfortunately I did not manage it optimally this time, but if you do it will look great. 😉
Now you just have to turn your lining to the inside and “stuff” the sleeves into the sleeves of your outer dress – the pretty side of your linning should be visible if you look on the inside of your dress now -, fold over the seam allowance of the lining and sew it by hand to the zipper band, but leave a gap under the zipper, so you will be able to make a great “invisible” dress seam and properly sew in the cuffs later. And that brings us to the next point.

Part 6:
The cuffs
Fold each of the two cutted parts for the cuffs on the long side (left side facing) and iron them, this way you already have the foldline in your fabric. Now unfold again, fold it back, but this time right sides facing and sew along the narrow side till right before the seam allowance, these have to stay open. Cut back the corners as I have described it for the collar, turn the cuffs back to the right side, press out the corners and iron. On one side of the cuff make 2 buttonholes & on the other sew on 2 buttons. If you do not know how to sew buttonholes with your sewing machine, you usually find a pretty good description in the manual of the sewing machine. That’s why I do not properly explain it here.
sew in the cuffs
Now it gets a little tricky! Your start by sewing your outside cuffs right side facing to your outside sleeves and fold it on the ironed foldline. So far not difficult.
Now you reach throw the left open gap on your centerback, grab the sleeve of the lining and the matching side of the cuff the way you want them to be together, so you know after pulling all this out of the gap, how this has to be sewn together (rights sides facing). Pin it and sew, repeat this on the other side und do not forget to finish this seams. Now as one side of the cuff is attached to the outer- und the other side attached to the lining-sleeve, pull the sleeve back out. Now the only major thing that is left is the hem and your dress is almost ready.

Part 7:
The hem
For this you have to reach through the left open gasp into the dress again, grab between the lining and the upper dress, down to the later hem and grab both layer of fabric. I always try to grab them the way I want them to be sewn together (right sides facing), before I pull it out through the gasp. This way, I realised, it is much easier not to get confused about how to pin these parts together.
Pull and rotate the fabric gently, because after all you want to sew a “circular seam” and to be able to do so you simply have to pull the entire skirt hem out through the gasp. Once you have sewn and finished the seam, put everything back through the gasp and your “invisible” hem is done.
Here at my dress I decided to sew an extra seam from the outside, because I have used a woven viscose as lining which is liked to stretch a little and I do not want the black lining to peek out at the hem. But if you have used the same fabric for both – as I usually prefer – you will be just fine with only this “invisible” hem. Now just manually close the gasp under the zipper and tadaaaaa your dress is ready! 🙂
Extra note:
Especially if you have used different kinds of fabric for main (outer) and linning dress, it is always a good idea to put your dress on clothes-hanger and leave it there for a night or at least a couple of hours, before sewing the hem. This way both fabrics reaches is max. length, each on its own, and it is easier to get a regular hem.
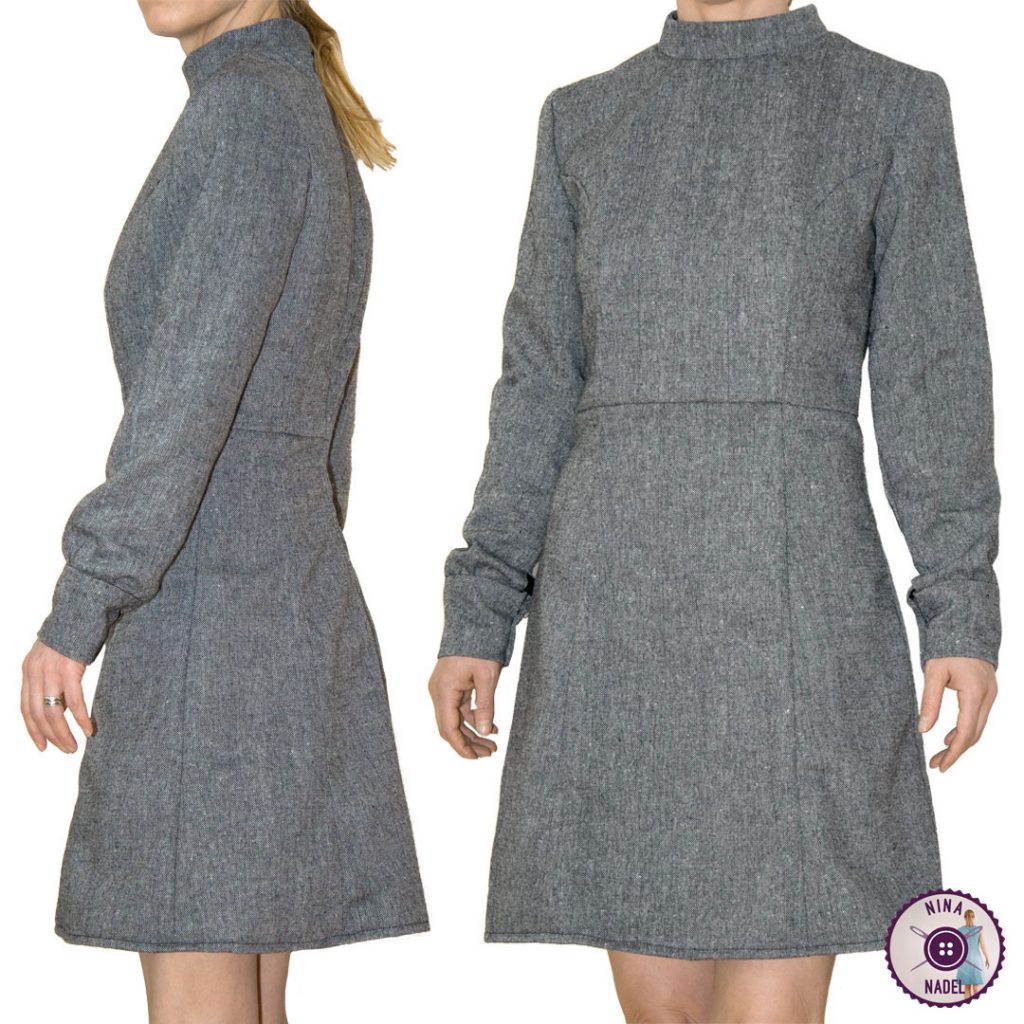
Part 8:
My winterdress (result)