Knitting-Tutorial: Picking up stitches from Garter stitch selvedge
Since I have been knitting a lot of socks lately and have noticed things I didn’t know, I thought I would write a knitting tutorial on picking up stitches from the Garter stitch selvedge today. Also as a reference book for myself, because in the instructions I used for socks with a flap and gusset heel, for example, it always just said – now pick up stitches – but not exactly how to do it!
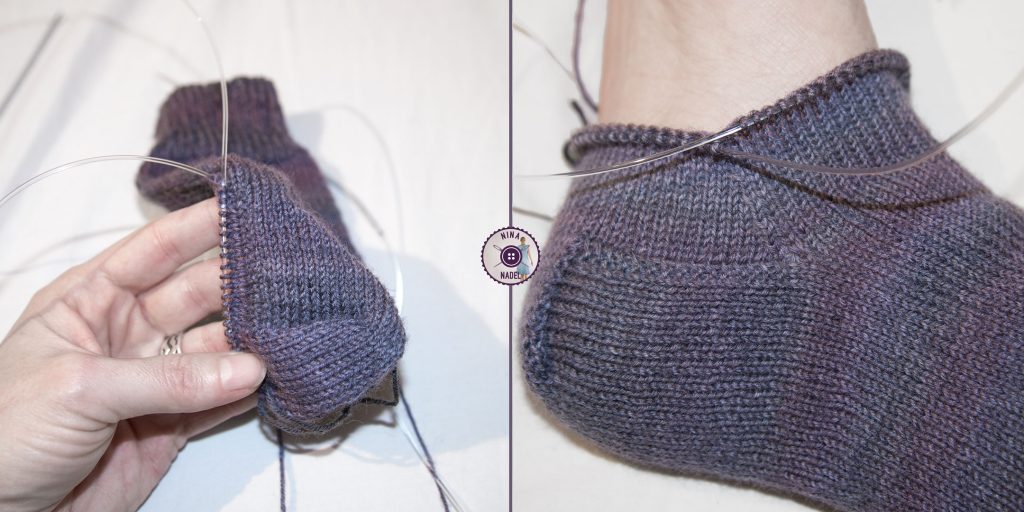
Here is an example of how it should look later:
and HERE you can find a photo of the finished socks!
How to knit the double garter stitch selvedge
Knit the first two and the last two stitches of every row. (= knit these stitches on the right side as well as on the wrong side)
NOTE: Of course you can also use the single garter stitch selvedge, which works as follows: Knit the first and last stitch of every row (on the right side as well as on the wrong side) – the principle of picking up stitches is identical to the one I describe here.
Both edges are definitely great to use for socks with flap and gusset heels, as both resulting edges are nice and sturdy and don’t curl.
How do I pick up stitches at a Garter stitch selvedge:
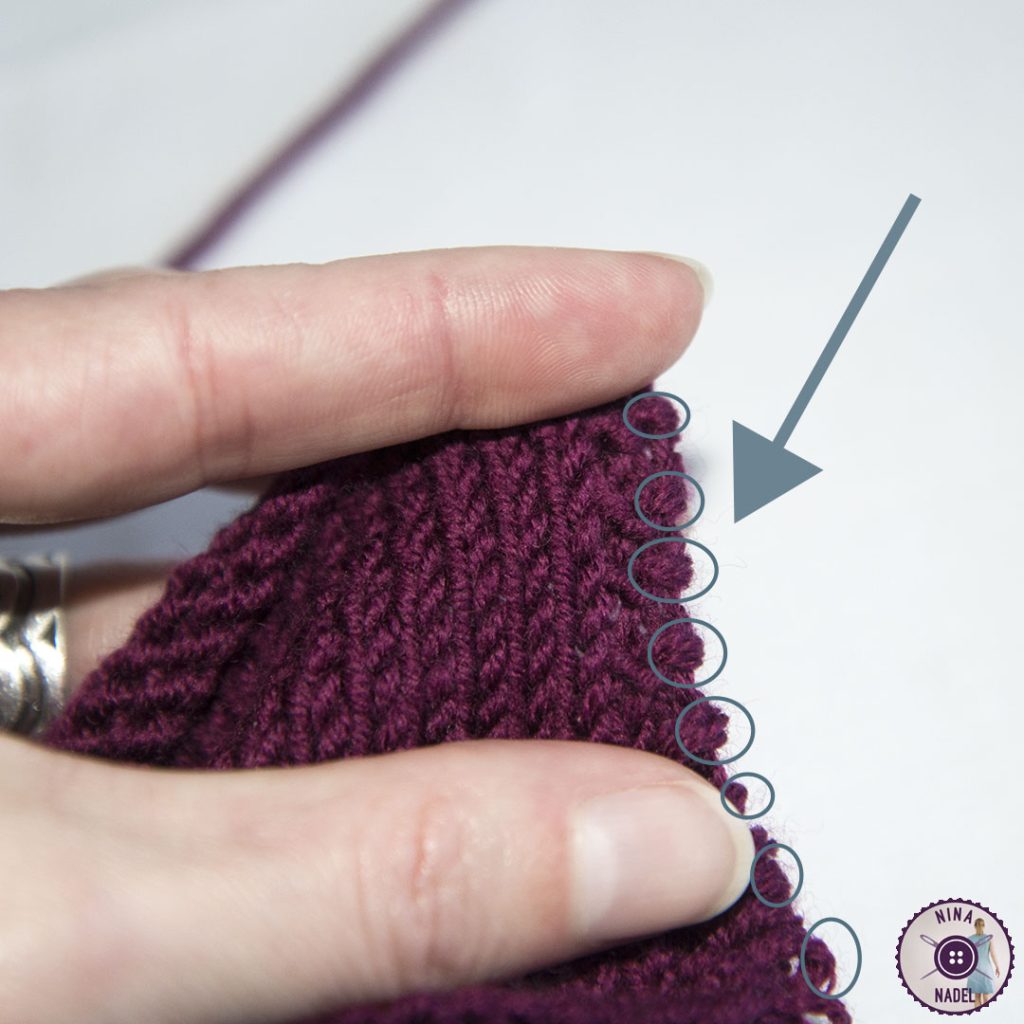
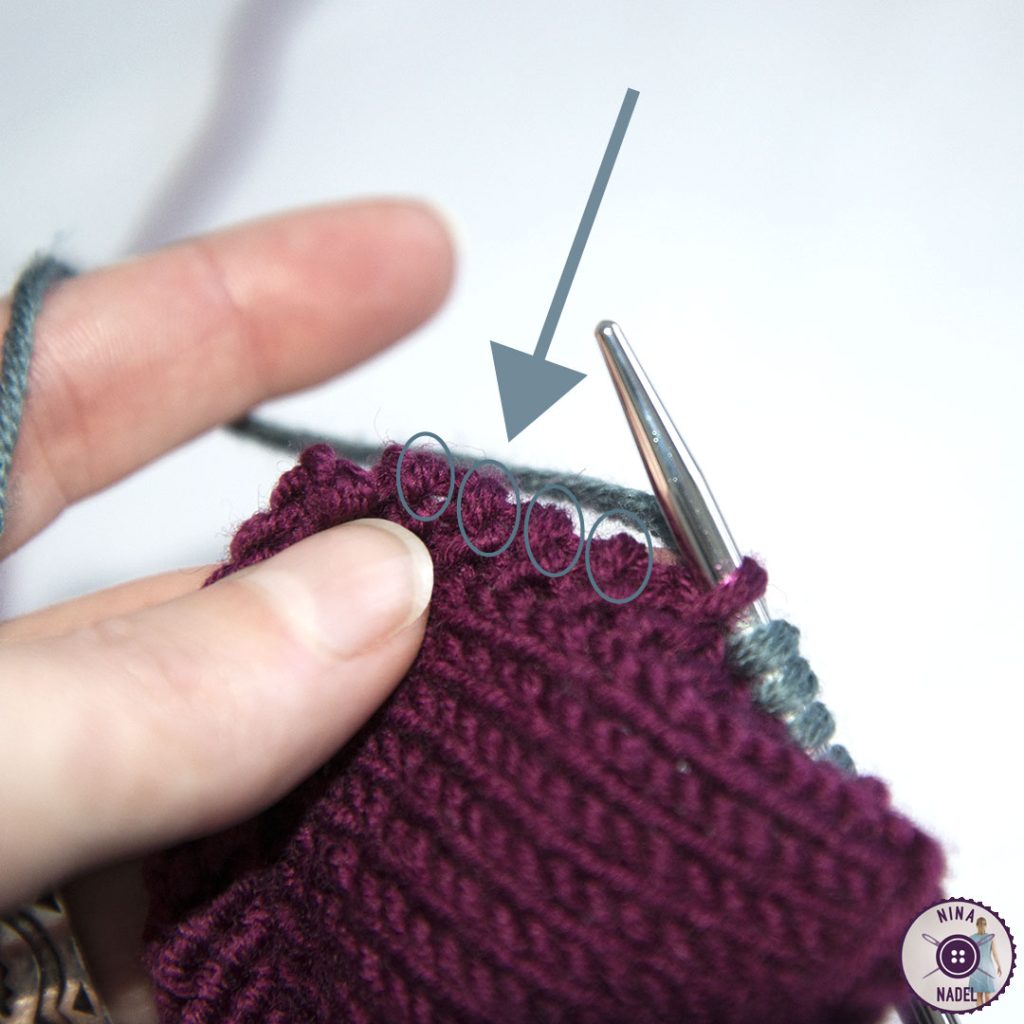
For this tutorial I knitted a small square in stockinette stitch with a double garter stitch selvedge on both sides, as if I had just knitted the heel of a sock, only without the sock! 😉 The small circles mark the “loops” where the stitches will be picked up from right to left with the righthand needle.
Info: For example, if you have knitted 32 rows for the heel flap, then you have 16 “knots” (loops) from which 16 stitches can be picked up.
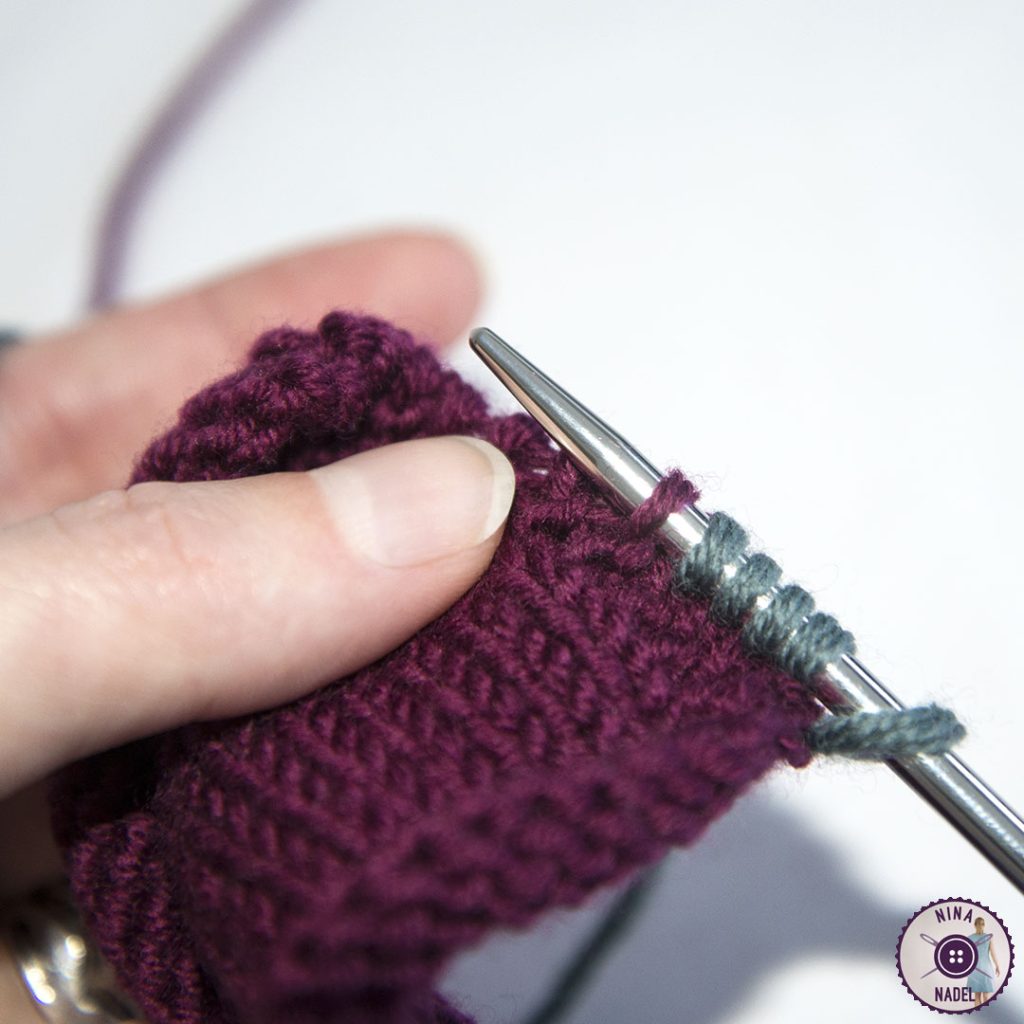
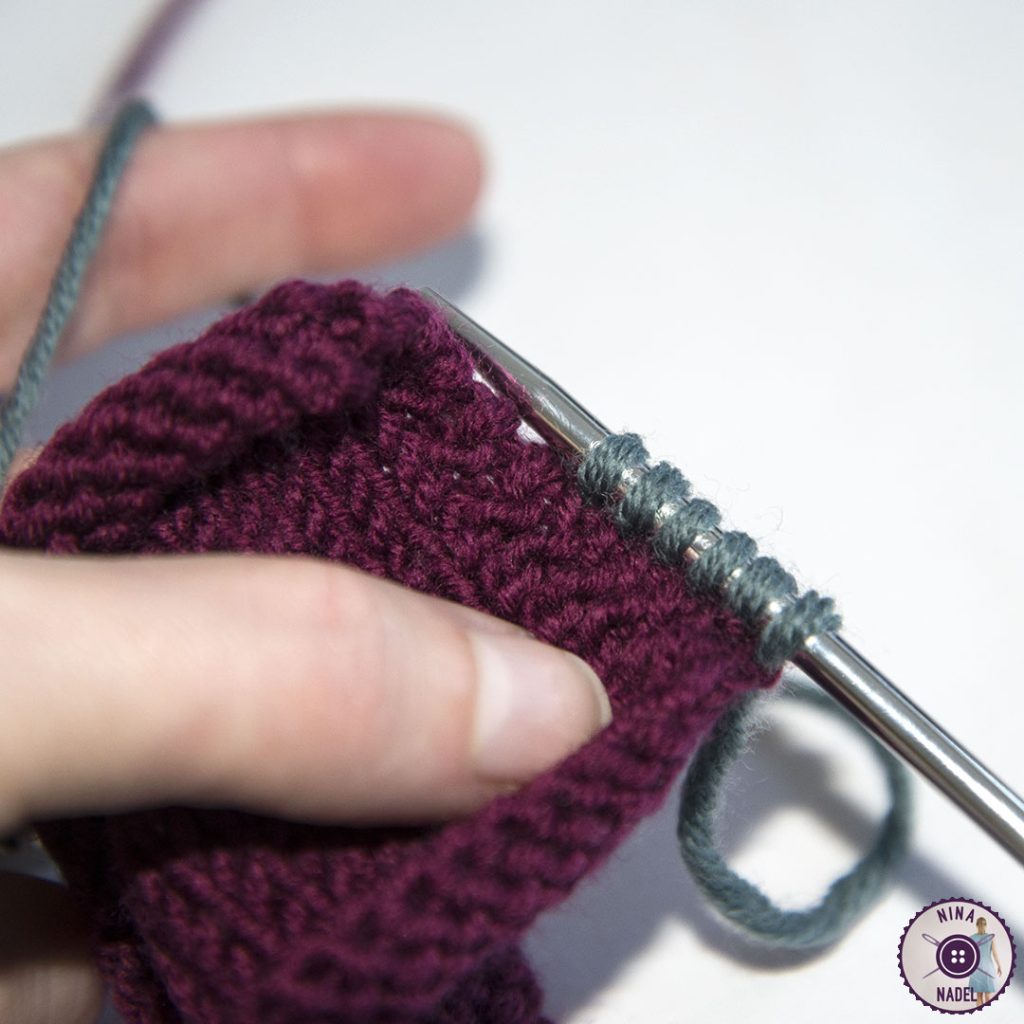
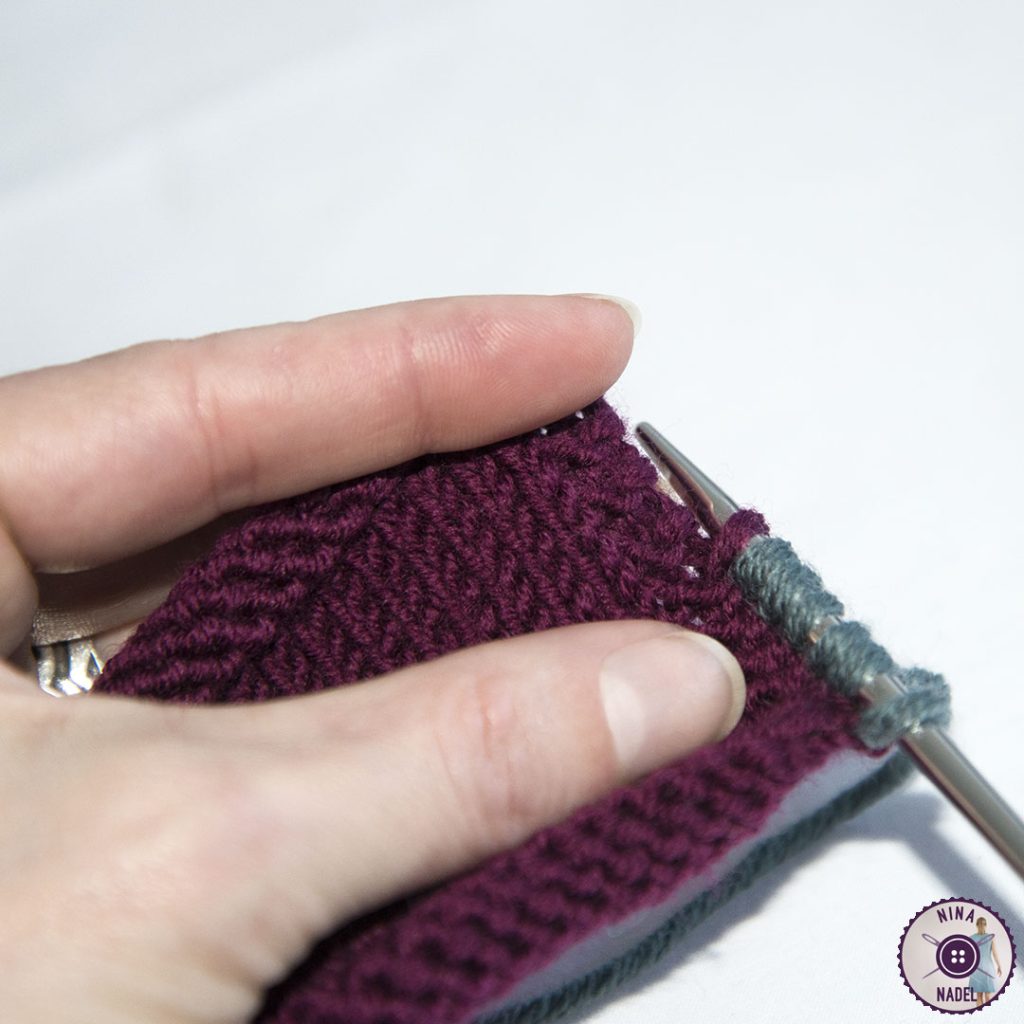
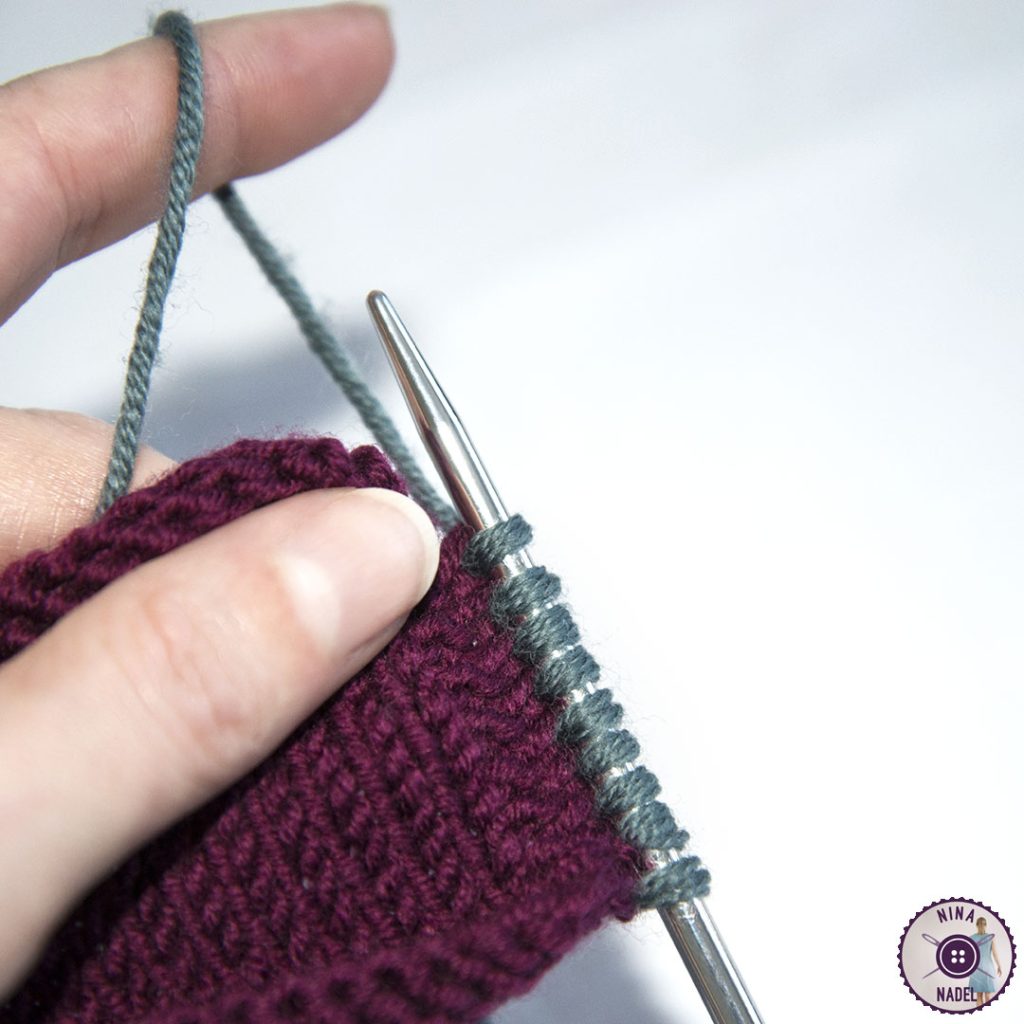
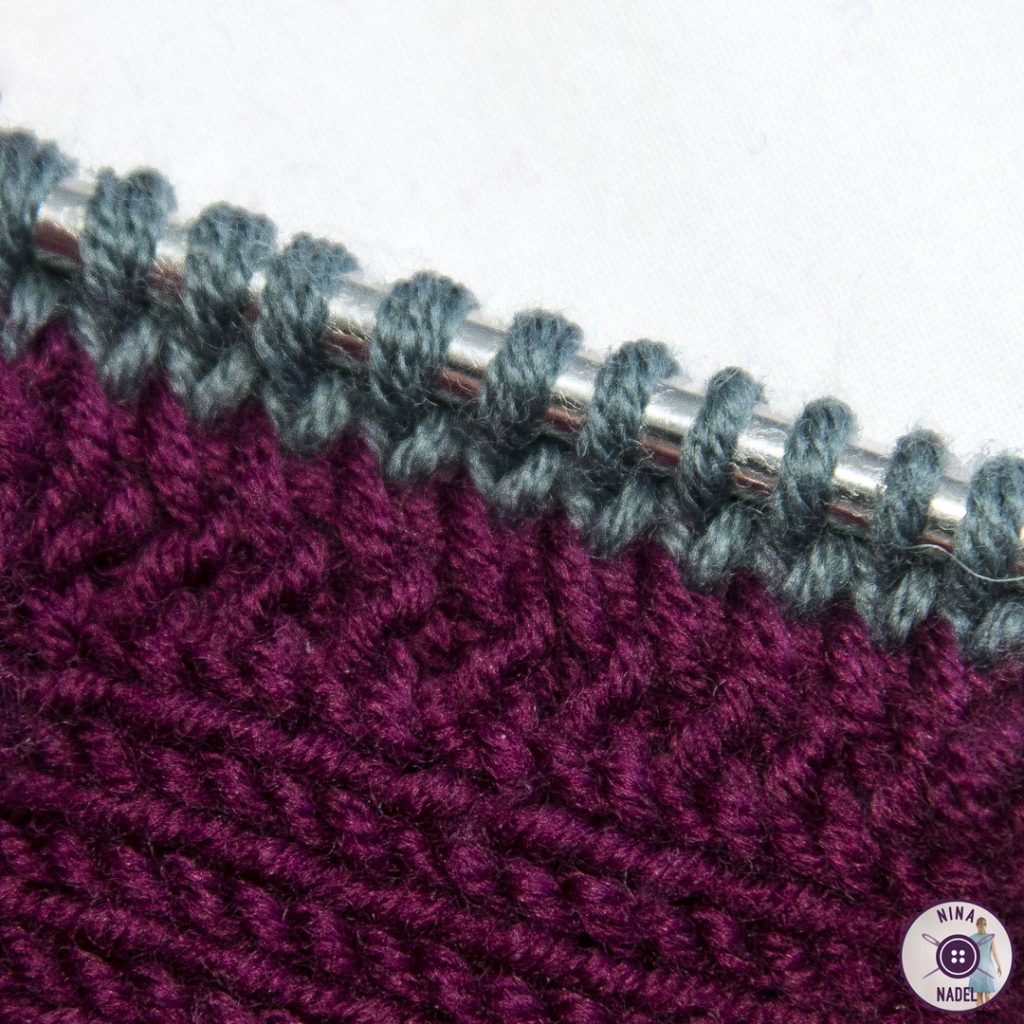
In the following two pictures I have already picked up a few stitches with green yarn.
Knitting tutorial: Picking up stitches from double Garter stitch selvedge
And this is how it works: The “loops” from which the stitches are picked up are again marked with circles in the following photo.
Pick up the “loop” from right to left with the righthand needle, get the working yarn (here green) with the (righthand) needle from behind (or put the yarn around the needle from front to back) and pull it back through the “loop” – you now have one picked up stitch on the righthand needle)
and this is how it is done with each “loop”
until you have the required number of stitches picked up.
If you have used the correct “loops”, the stitch pick-up on the backside (wrong side) looks like in the following photo: The transition from heel flap to picked up stitches is even, which is important because otherwise the sock might be uncomfortable to wear.
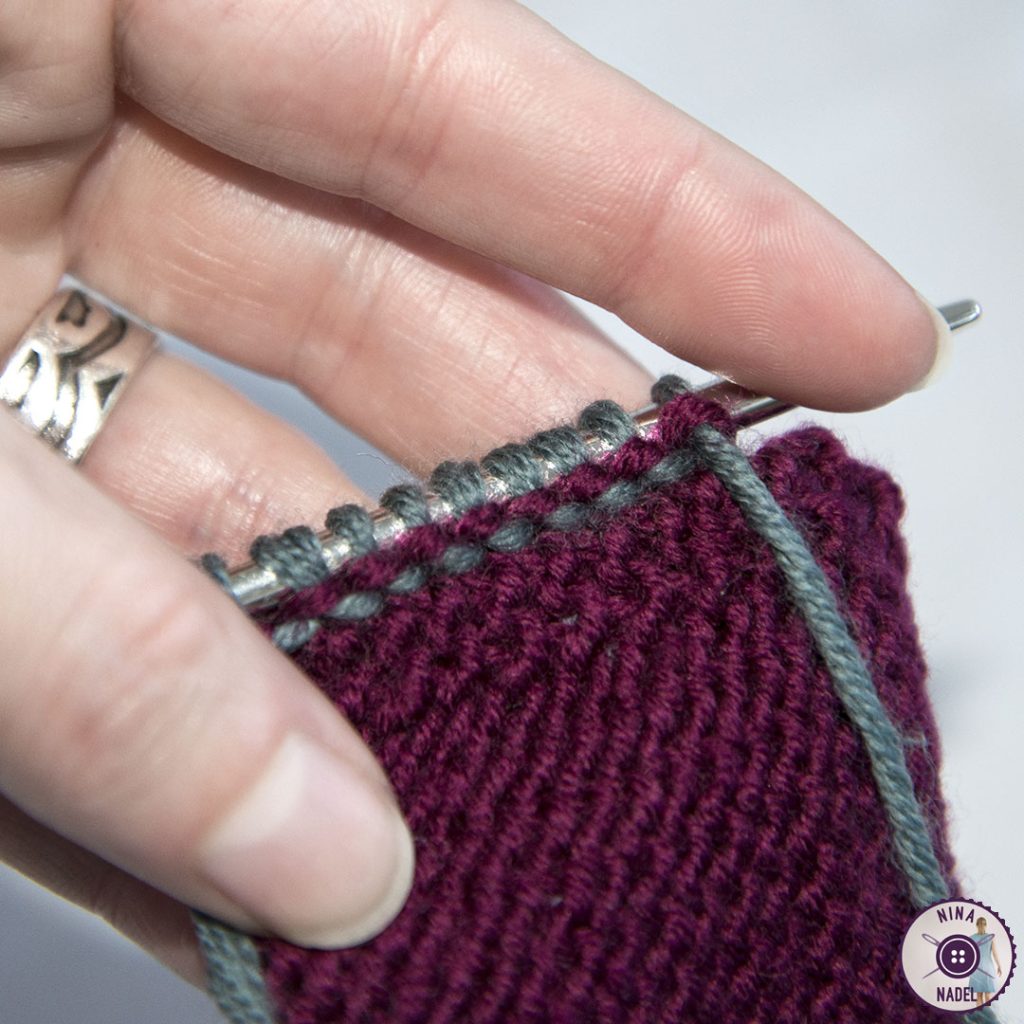
And this is how the stitch pick-up looks after you knitted one round: Clean and tidy and without holes!
If you have any questions, please write to me! 🙂 Click HERE to get to the contact form.
